
Forecast: Partly Cloudy (Part 1)
One thing that is for certain is that the cloud is here to stay. With more and more offerings having a cloud component, managing data and applications that are not on-premises will become commonplace. Some applications are optimized for this brave new world we’re living in (Oracle BICS comes to mind), but the old guard still remains, and we will need to be ready for integrating these new technologies into the old. In this series of blogs, I’ll walk through two cloud based data sources that I recently connected to OBIEE 11.1.1.7 on Windows VMs.

If you’ve ever opened up the properties window for a physical database in the Oracle BI repository, you’ll see a large list of database types. You’ll see plenty of Oracle offerings, the usual suspects such as DB2 and SQL Server to name a few, and several more obscure platforms (Access ’97 anyone?). What you won’t see however, are newer, cloud based databases. So, how would you go about connecting OBIEE to the data that you have stored in the cloud?
AWS Redshift Overview
Redshift is one of Amazon Web Services’ five database offerings. It’s billed as the “fast, simple and cost effective” database solution, and it certainly is fast and easy to use from an admin perspective. It is based on a Postgres database architecture, and has tons of excellent features that compliment the rest of the AWS stack; data backups are possible with S3, query performance is optimized depending on your data volume and the size of your cluster, and it is easy to scale and manage. You can read more about the features of Redshift here; I see it as a great cloud based database option.
Connections to Redshift are easy; download and set up your desired driver (ODBC or JDBC), get the URL or connection details from your Redshift admin, and then query away. Like all things AWS, be sure that your security groups are set such that you can query your cluster!
One thing to note is that the recommended 3rd party query tool for Redshift is the open source SQL Workbench/J, which you can download here. I was able to get my SQL Developer to work with Redshift, but I have found the set up to be much easier with SQL Workbench/J. Because of this, I have defaulted to that tool when querying against Redshift sources.
Since OBIEE does not support JDBC connections for metadata development, I’ll be demonstrating the ODBC set up below.
Connecting to Redshift via ODBC
If we want to connect to Redshift by an ODBC connection, the first thing we will need to do is download the Redshift ODBC driver (which you can get here). Once you have downloaded the file, double click it to open the install wizard and click your way through the install process.
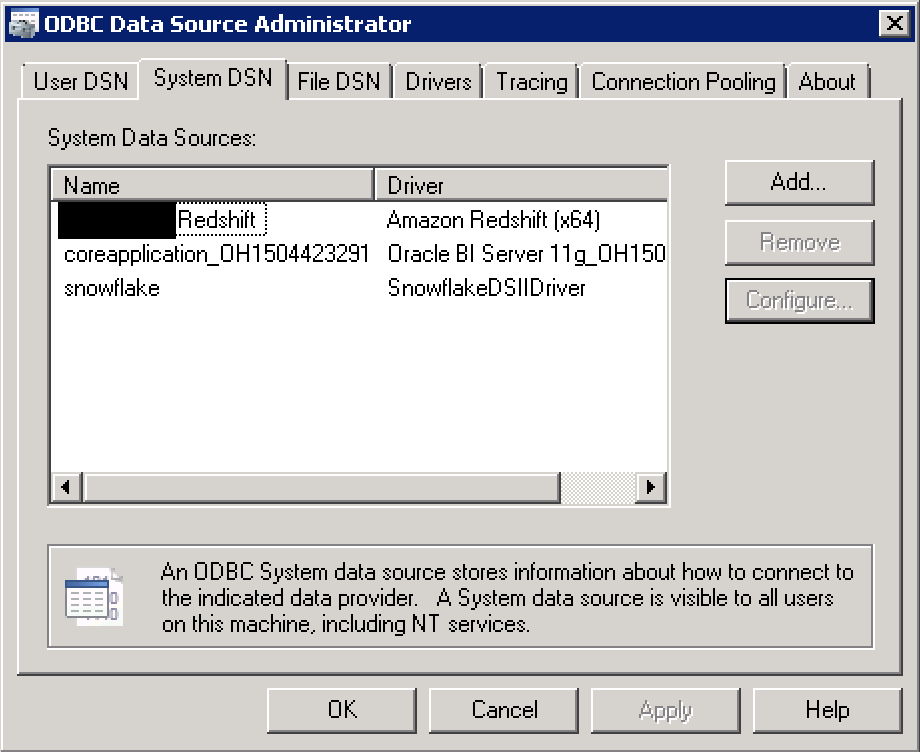
Once you have the Redshift ODBC Driver installed, open up Microsoft ODBC Manager, and click on the “System DSN” tab. Then click on the “Add” button.
You’ll be presented with a list of all of the available data source drivers. Find your Amazon Redshift driver in the list and then click “Finish”. This will then open a connection set up window.
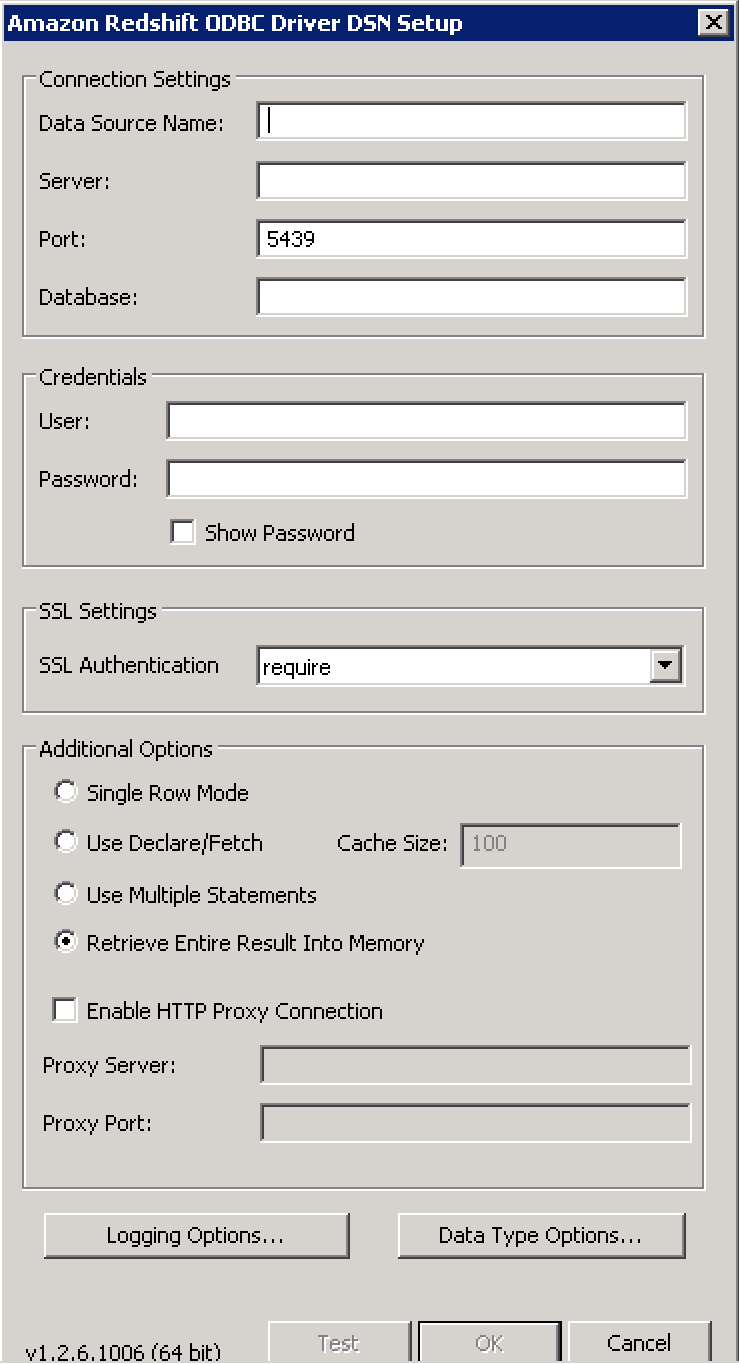
In this window, fill out the top six fields. You can find some of this information within the Cluster Database Properties section in the Redshift Cluster web page.
Data Source Name: This is the name of the DSN you are creating.
Server: This is the server information that is found within the AWS Cluster. Conveniently, it is copy and paste-able.
Port: This is the database port. The default port for Redshift is 5439.
Database: This is the name of the specific database within the Redshift Cluster.
User: This is the database user you want to connect as.
Password: This is the database user’s password.
Once you have input all of the credentials, click on the test button at the bottom of the window to test the connection. (If you cannot connect, be sure to check out your VPC security group settings for your AWS Cluster!)
Once your System DSN is configured, close Microsoft ODBC Manager and open your OBIEE Admin Tool. Right click in the Physical side of the repository and select “New Database…”. Name the new database and then click on the “Connection Pools” tab. Click the green plus sign to add a new connection pool.
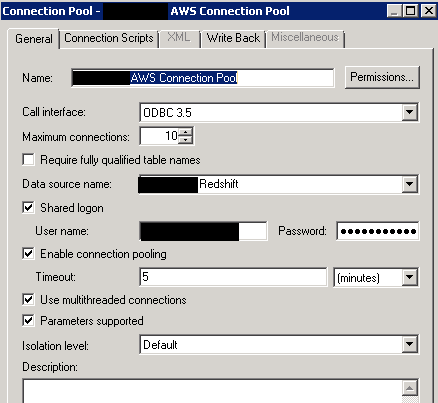
Set up the connection pool with the appropriate credentials by selecting the data source in the “Data source name:” drop down. Then, enter the user name and password and adjust any other parameters you see fit. I used ODBC 3.5 rather than the default (which is ODBC 2.0). Once your connection pool is set up, you will be able to import metadata into your physical layer.
Once you have your metadata imported and modeled, you’ll want to test it in OBIEE, right? Deploy the RPD and create an analysis with your new Redshift sourced data.
You should be able to query your data and get some results. A word of caution though: I’ve found with Redshift that some functions queries do not work as expected in OBIEE. I received the following error when using a TIMESTAMPDIFF function against a Redshift source:
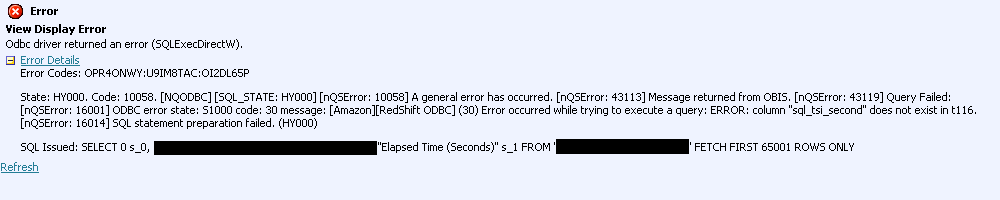
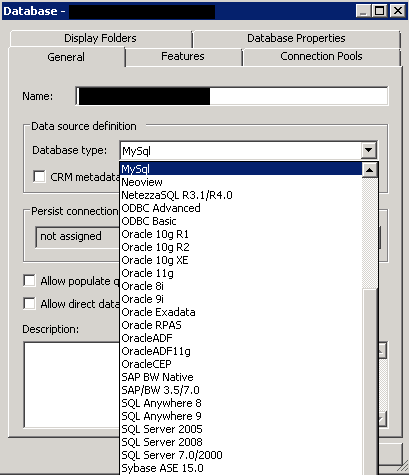
After doing some digging into the Redshift documentation and playing around in my RPD, I found that changing the database type in the physical set up to “MySQL” allowed me to get accurate results with no errors. I think that this is because of MySQL and Redshift’s common ancestry in Postgres, but I’ll be the first to admit that this is a bit of a hack. However, it will do until we see the cloud databases supported in the Admin Tool.
Conclusion
Solutions and storage options will continue moving into the cloud, and we will undoubtedly see more nuanced ways of connecting to the data sets that we wish to analyze because of it. OBIEE will be able to adapt to these changes, and even be able to incorporate cloud based solutions like Redshift into traditional on-premesis deployments.