So You Want to Migrate to Snowflake – Part 1
In this series, we are showcasing a fictitious midsize brokerage company moving their technical environment to the cloud. We have established previously, the company is experiencing contention issues, at both the user and hardware level. We will talk about the Oracle BI migration in a future blog; but first, we have to get the data to the cloud. This post will walk through the typical steps employed to migrate data from an Oracle database on site, to a Snowflake database in the cloud.
Preamble
In the Use Case Summary, we laid out a problem statement for a fictional Midsize Brokerage company that included the following issues related to the database.
- Load processing time
- User and Data Load Contention
- Backup and maintenance issues
- Aging hardware and hardware failures
- Data availability
Red Pill Analytics solutioning to the data issues for this client was to introduce Snowflake Data Warehouse in the cloud to replace the on-premise database. Snowflake’s data warehouse is a true SaaS offering, built for the cloud. We’ll go through each of the issues outlined above to highlight how Snowflake addresses it, and then we’ll get into the practicalities of how we got them there.
Load Processing Time
Snowflake offers near infinite scalability through virtual warehouses and multi-cluster warehouses. Virtual warehouses in Snowflake define the processing power available to data loads and queries. We’ll talk more about virtual warehouses in a bit.
User and Data Load Contention
Snowflake allows you to create multiple virtual warehouses that help isolate processes such as loading data and users to querying data or running reports. A virtual warehouse would be spun up for ETL and Load processing activities, and a separate virtual warehouse dedicated to users ad hoc queries and reporting.
Backup and Maintenance
Snowflake employs Continuous Data Protection features that take the place of traditional database backups. Time Travel and Fail-Safe are two features included in CDP that allow you query or restore data back to a specific point in time (within the last 90 days). Upgrades, critical security, and patching are all handled by Snowflake with no downtime cost.
Aging Hardware and Hardware Failure
As a true SaaS offering, there is no hardware to purchase or maintain.
Data Availability
The Snowflake deployment extends across three availability zones so that Snowflake can
continue to operate even if two of these zones become inaccessible or unavailable due to the loss of network connectivity or in the event of a disaster. The Snowflake storage layer is synchronously and transparently replicated across multiple disk devices and availability zones through the Amazon S3 service. Snowflake’s virtual warehouse and cloud services layers are similarly deployed across three availability zones in a region.
But first, in order to take advantage of all of Snowflake’s benefits, we need to get the data to the cloud. We’ll walk through these steps next.
Virtual Warehouse
A virtual warehouse in Snowflake is a cluster of compute resources that Snowflake utilizes to perform operations such as SELECT, DELETE, INSERT, UPDATE, and COPY INTO. One of the great features about Snowflake is that the storage and the processing are separate and distinct. Meaning that we can spin up multiple warehouses to access the same database storage. This is useful for multiple reasons, but in our case, user contention issues with the ETL. With Virtual Warehouses in Snowflake, we can create separate warehouses for the ETL and Reporting/Ad-hoc so that they two are never competing for resources. Additionally, a warehouse in Snowflake is configured to only be active (and subsequently charged for) when it is in use. When not in use, the warehouse will shut down automatically after some time, so that you are not charged credits when not in use. When someone accesses the warehouse when it is down it will start back up automatically.
Click on the Warehouses icon at the top of the screen in Snowflake. And click the Create (+) button to create a new Virtual Warehouse.

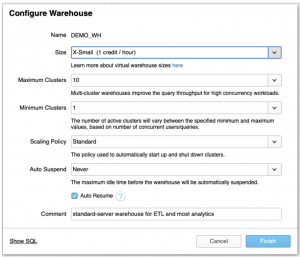
The warehouse size represents the amount of compute represented in T-shirt sizes so-to-speak. Each warehouse size is twice the size of the previous warehouse. For instance Large is twice as big as Medium and so forth.
We can define minimum and maximum clusters, allowing the warehouse to scale by spinning up additional warehouses in a cluster if and when a workload become too high on the original warehouse. Important to note that based on the scaling policy, the cluster warehouses will spin up and down automatically as needed. So if the workload becomes too much for the current warehouse, Snowflake will spin up an additional clustered warehouse to ease the load. When the workload drops back down, Snowflake will turn off the additional clustered warehouse to save resources and credits.
You can also choose to Auto Suspend the warehouse all-together when there has been no activity for a set amount of time. Optionally, you can also set the warehouse to never suspend if requirements call for it.
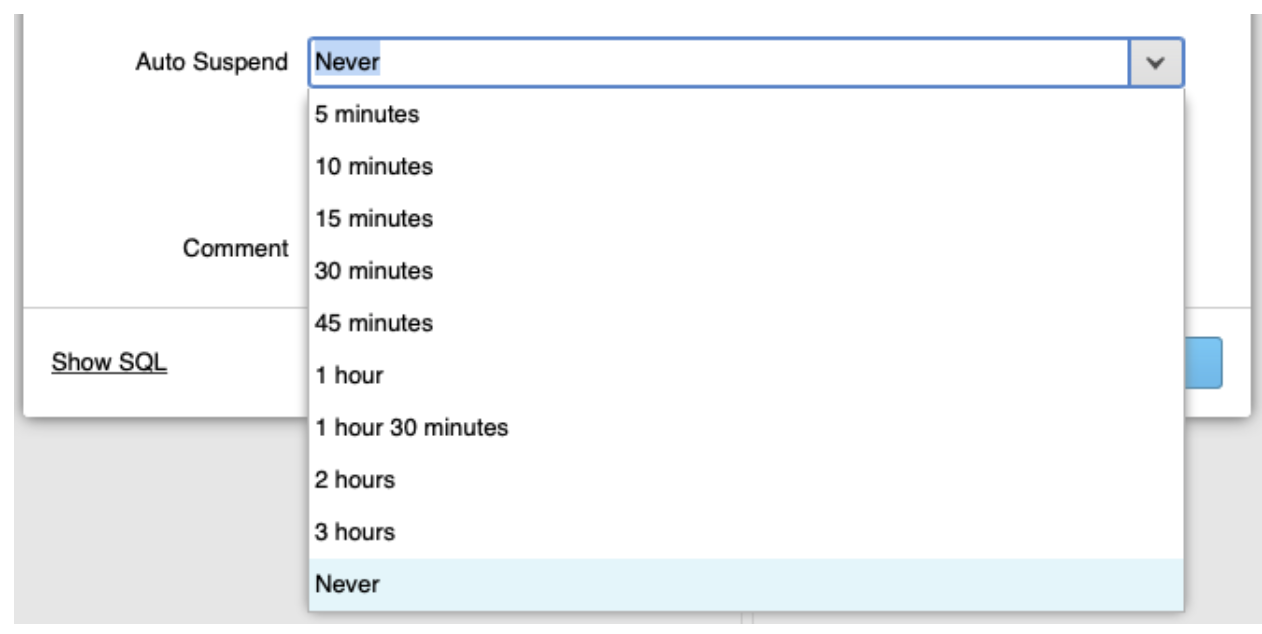
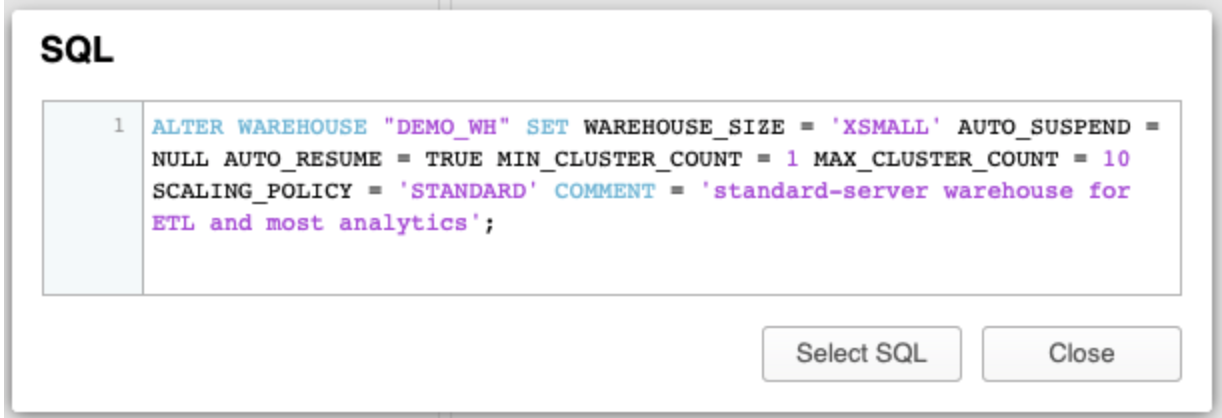
The Show SQL button, will also reveal the syntax that could be used to generate a new Virtual Warehouse from the SQL worksheet, rather than using the provided GUI, allowing you to automate the creation of new objects in Snowflake.
Preparation
The first part of moving data to Snowflake is preparation. This includes capturing information about your current environment such as, any available documentation, identifying the team, identifying the data to be moved, and defining deadlines, budge and success criteria. For the purposes of this use case, we’ll focus more on the technical aspects. Snowflake has some good documentation here, on their site that will help aid in the project management aspects of preparing and executing your data migration to Snowflake. It is also worth noting that we will be demonstrating the data migration steps in Snowflake manually for the rest of this series. While it is good to have an understanding of what is happening behind the scenes, there are some tools on the market that help to automate data movement and migration to Snowflake. Red Pill Analytics is partners with one of the more prominent Snowflake data integration and migration tools Fivetran. While we won’t dive into all features of Fivetran in this blog, we invite you to check them out at Fivetran. We will visit Fivetran and Snowflake integration in another post.
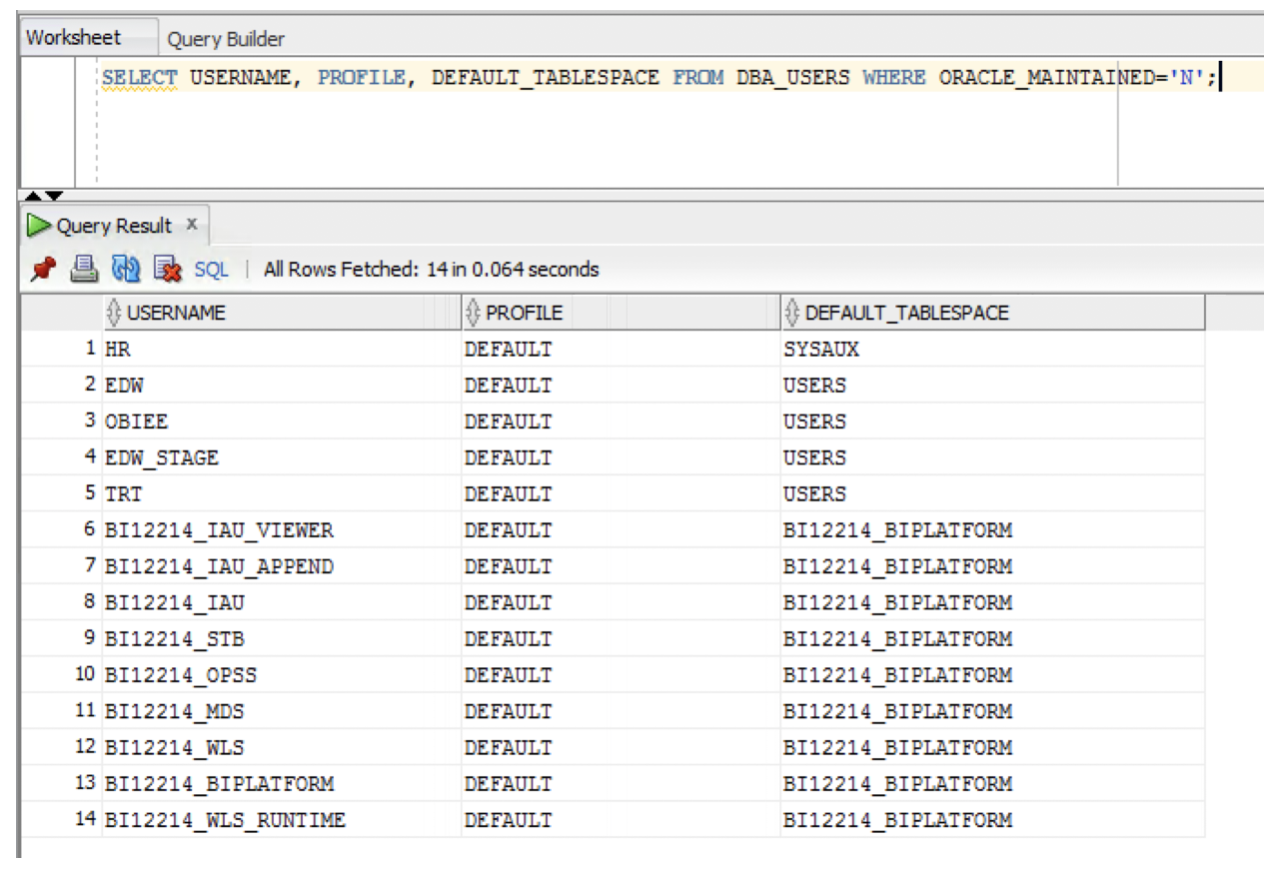
So we’ll start with identifying the data that needs to be moved. This includes databases if there are multiple, and database objects. Schemas and objects specific to Oracle do not need to be migrated. This includes schemas such as SYS, DBSNMP, etc. If you are running Oracle database 12c or 18c you can run the following SQL to pull back users and schemas, excluding Oracle created and maintained schemas.
Note that PL/SQL objects like stored procedures and functions will need to be rewritten in Snowflake using either Python or native JavaScript UDFs.
This is also a good time to address any objects that are broken or don’t function optimally in the current environment. It is recommended for the initial migration that you do not attempt to introduce too much change that may extend deadlines and inject risk into the project.
It is recommended to prioritize your data sets and define iterations to complete the migration. For the purposes of this use case, we’ll be focusing on the TRT and EDW schemas which represent our raw/stage data (TRT) and warehouse data (EDW) respectively.
One of the first things we’ll do in Snowflake is to define security roles and access, so we’ll need to go ahead and document the current security setup in Oracle. We need to get a list of users, roles and membership defined in the database. The sample scripts below are a good start to identify and document this information.
--List all users and schemas that are not oracle maintained
SELECT USERNAME, PROFILE, DEFAULT_TABLESPACE FROM DBA_USERS WHERE ORACLE_MAINTAINED='N';
--List all roles in Oracle
SELECT ROLE, ORACLE_MAINTAINED FROM DBA_ROLES WHERE ORACLE_MAINTAINED='N';
--Users with direct grant access to a table
SELECT GRANTEE, OWNER, TABLE_NAME, PRIVILEGE FROM DBA_TAB_PRIVS WHERE GRANTEE != 'PUBLIC';
--All system privileges granted to all users
SELECT * FROM DBA_SYS_PRIVS;
Running these commands will pull back information similar to the following.
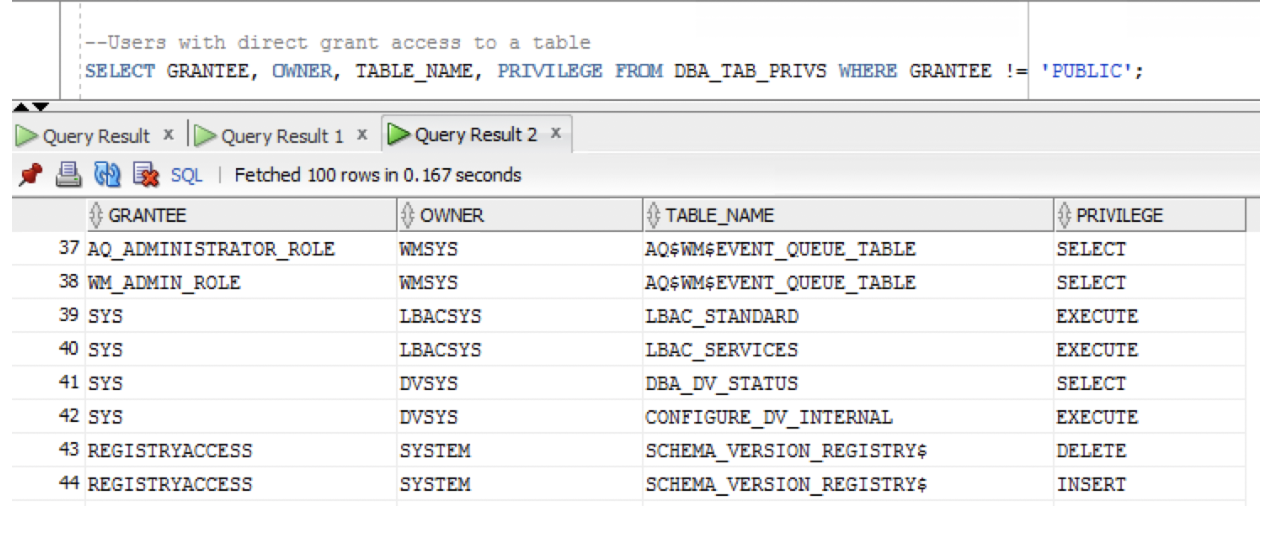
Security in Snowflake
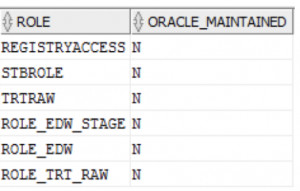
Let’s start with the roles that we pulled back from Oracle. We need to create the corresponding roles in Snowflake. For the purposes of this use case we are interested in the following:
- ROLE_EDW_STAGE – Stage and integration schema data
- ROLE_EDW – Warehouse facts and dimension data
- ROLE_TRT_RAW – Raw data from source
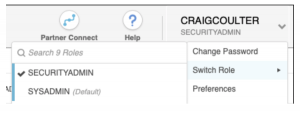
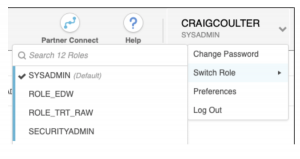
When you create roles in Snowflake you will need to create them under the “SECURITYADMIN” role. Select your profile in the upper right, and chose “Switch Role” and select SECURITYADMIN.
Now let’s create the roles. We’ll do that in the Snowflake SQL Worksheet using the following commands.
CREATE ROLE ROLE_EDW_STAGE COMMENT = 'Brokerage EDW Stage Full Access';
CREATE ROLE ROLE_EDW COMMENT = 'Brokerage EDW Full Access';
CREATE ROLE ROLE_TRT_RAW COMMENT = 'Brokerage TRT Raw Data Full Access';
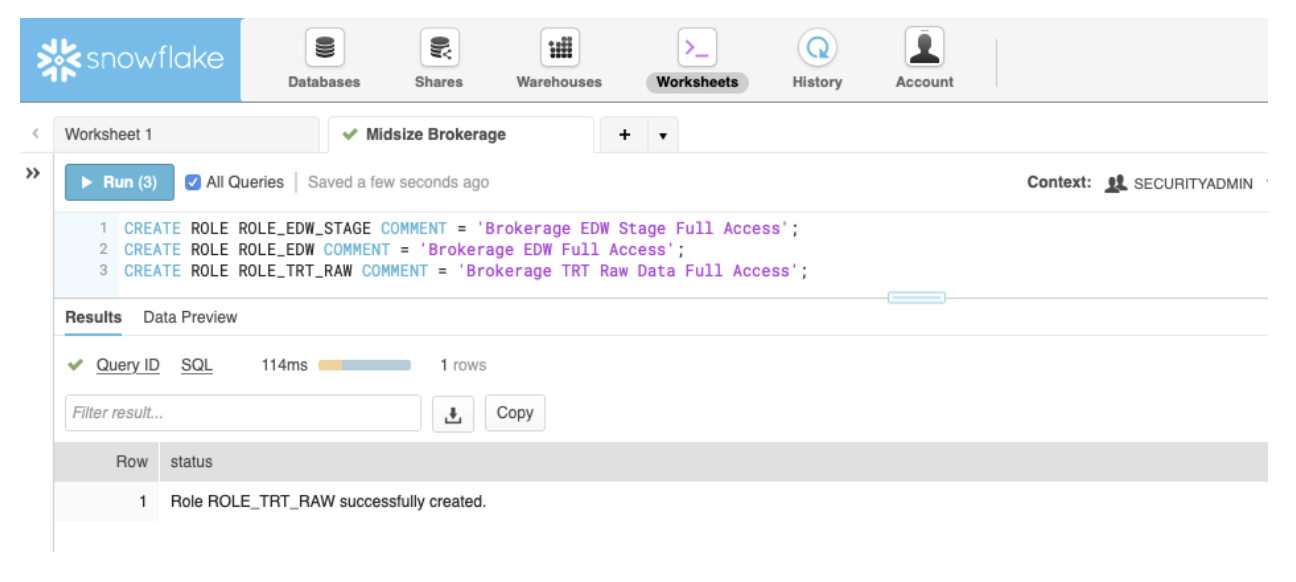
Take note that the syntax used in Snowflake is very similar to what you have grown accustomed too in Oracle.
To create a user in Snowflake utilize the following or similar syntax. You can immediately assign the user to a default role when they are created using the DEFAULT_ROLE parameter when creating a user
create user user1 password='abc123' default_role = myrole must_change_password = true;

With roles and users created, now we can start assigning permissions. Reference the user and role mapping that we pulled from Oracle earlier to create all the necessary roles in Snowflake. Roles can be nested, by granting a role to a role, as well as granting roles directly to users.

From the profile dropdown you can verify that new roles are now present for your account.
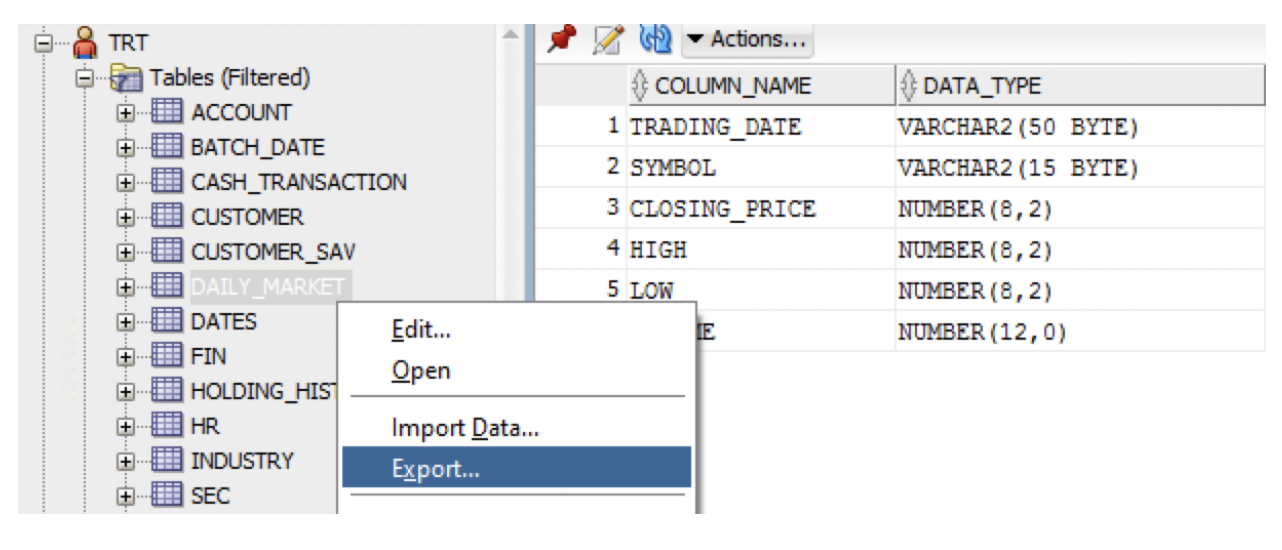
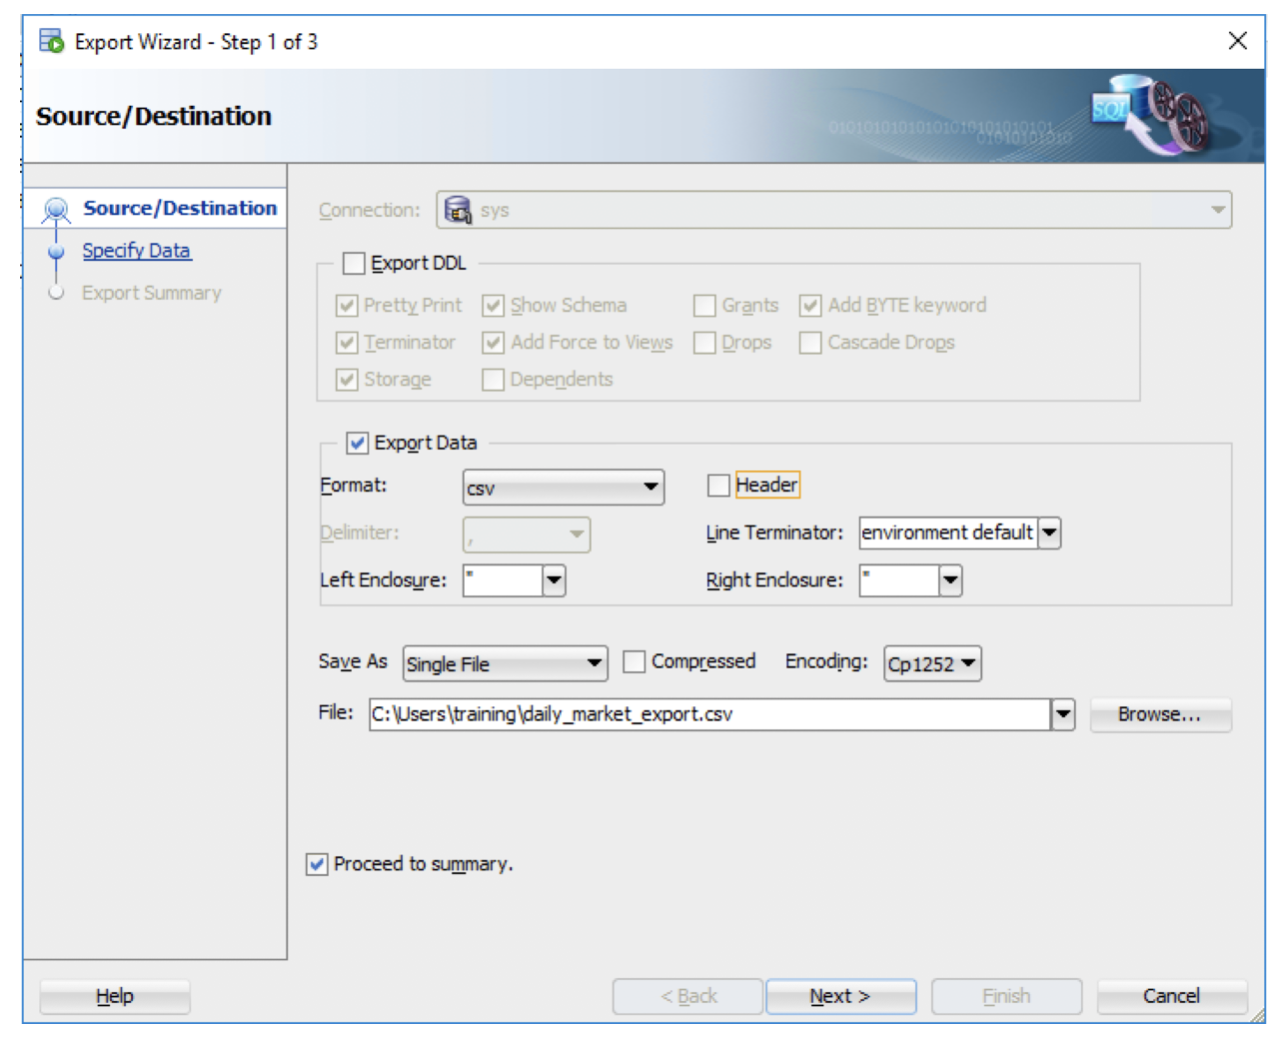
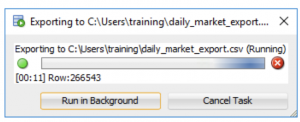
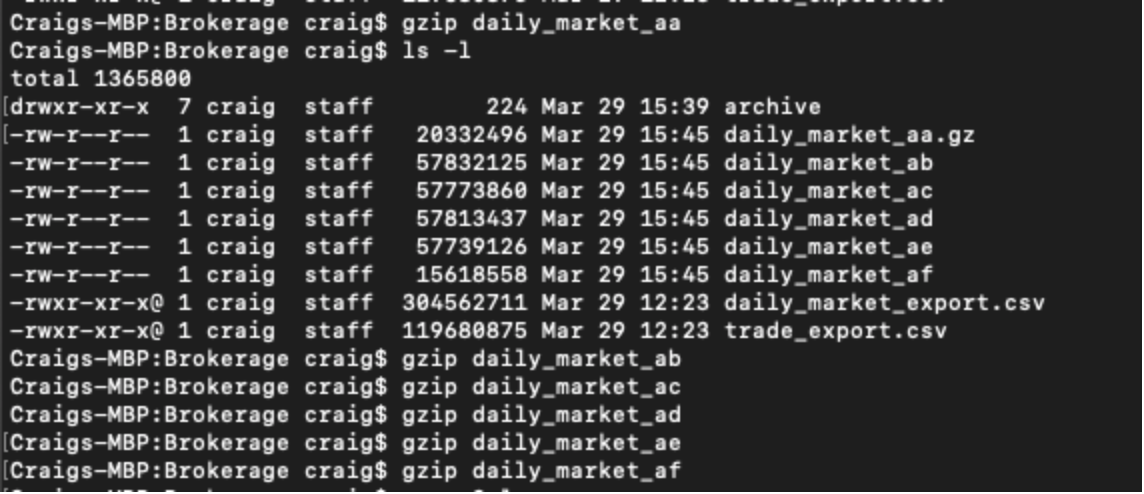
The resultant exported data file (daily_market_export.csv) is around 300MB compressed. Snowflake recommend splitting large files up into many smaller files, that are between 10MB and 100MB in size. On Mac OS or Linux, you can run the following command to split the file into multiple files breaking every 1 million rows.
split -l 1000000 daily_market_export.csv daily_market_

Splitting them gives us uncompressed files around 50-60 MB. Let’s go ahead and compress them in the gzip format. This compresses files down to about 20MB a piece.
Next we’ll need to copy these files up to our S3 bucket. The idea is that in Snowflake, we can create a bucket that will act as an external stage for all of our data files. This stage will be defined in our Snowflake database and a link created between the two that will allow Snowflake to load file directly from AWS S3. To make a bucket in S3, you can run a command like this from the AWSCLI.
aws s3 mb s3://brokerage-data --region us-east-1
Once the bucket is created, copy the files from your local machine up to S3.

Verify the files are successfully uploaded to S3.

Part 1 Recap
Okay to recap at this point. We have done the following:
- Exported and documented our security in Oracle
- Created security roles and permissions in Snowflake
- Exported our data from Oracle
- Split and compressed the data into performant chunks
- Created an AWS S3 bucket and uploaded our file
Stay tuned for our next post in this series.
In Part 2 of Migrating Data to Snowflake, we’ll finish setting up Snowflake by creating the database, schemas, and tables necessary to load the files we created here in Part 1. We will define the file formats for loading CSV files in the database. And we’ll also establish the external stage to AWS S3 that will allow Snowflake to import data directly from our compressed files in the S3 bucket. To finish it up, in the next section, we’ll have some thoughts about testing the new data against the old and provide some Oracle specific migration tips.
