
If you’re reading this post, you’ve probably seen my other post on connecting OBIEE to Amazon Web Services’ Redshift database offering. If not, thanks for joining in for this part of the adventure. To summarize the last post, cloud applications are becoming increasingly more common, and because of this fact, more of the data that is produced and consumed will be in the cloud. How can we connect on-premises business intelligence tools to these cloud sources? Specifically, how can we connect OBIEE to them?
Snowflake Overview
Snowflake is a relative newcomer to the cloud database world and has certainly changed how to think about traditional database solutions. Snowflake separates the data from server that is running it. In Snowflake, a database equates to storage, while a data warehouse equates to compute power.
Let’s stop and think about this for a second. Traditionally, a data warehouse means that hardware and software are on one machine. You may have an Exadata box running Oracle DB 12c, or maybe you have some rack servers with Linux and MySQL. Either way, the set up is limited because there are constraints on both the amount of compute power on the machine, as well as the storage. If we want to upgrade our warehouse to run faster or to store more, we are looking at purchasing new hardware to accomplish this.
In a different situation, we could find ourselves having one high powered server that serves as the compute power for several small databases. In this case, we would find each of these databases competing for memory from the server.
Like I said before, Snowflake changes this by separating the hardware aspect from the storage aspect. Snowflake separates the compute and storage so you can resize as needed. If your storage needs grow, you resize the database. If you need to increase performance, resize the warehouse. If you want to stop using a particular data source but need to keep the data for audit purposes, suspend the warehouse. Plus, other cool stuff such as cloning the data sources, and using different warehouses for data cleansing jobs and then dropping them when the jobs finish make Snowflake a cloud database solution that is markedly different from other offerings.
As with Redshift, I recommend using SQL Workbench/J as the non-browser based query tool. It is recommended by Snowflake, it is open source, and does a nice job. You can find it here.
Connecting to Snowflake via ODBC
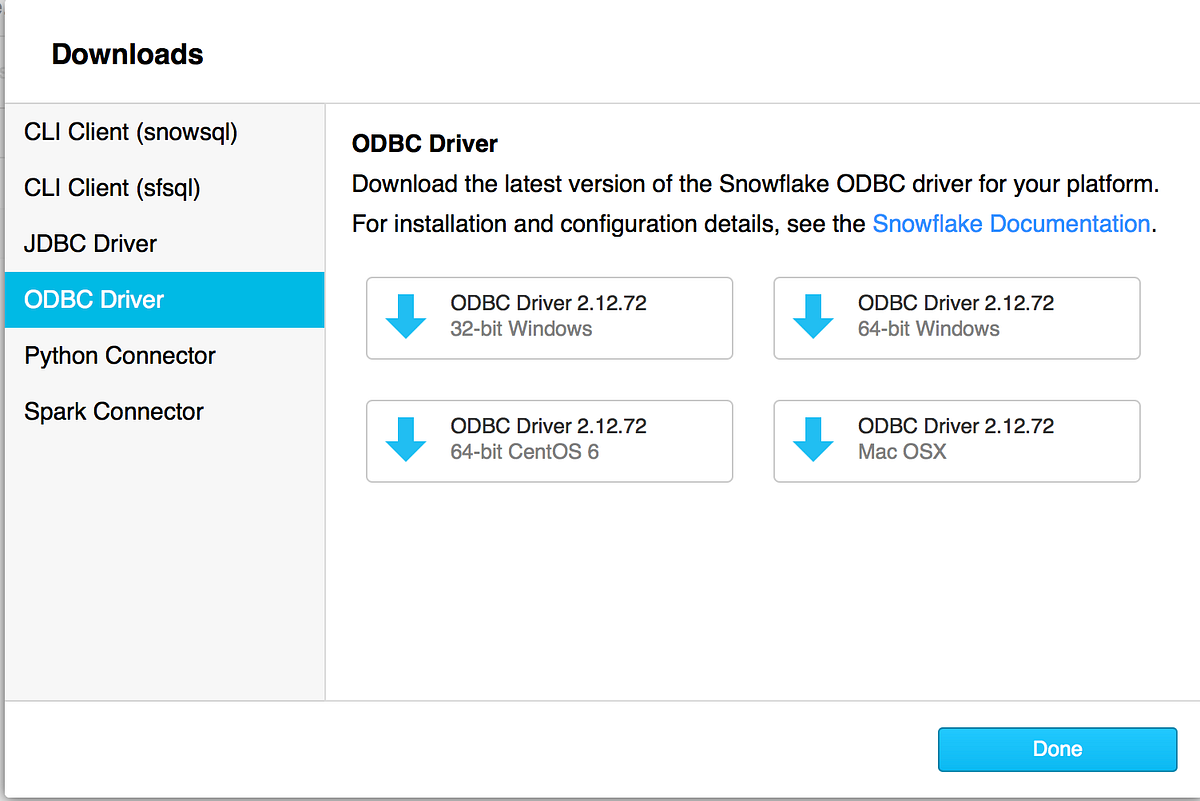
To connect to Snowflake with OBIEE, we will use a similar procedure to the one I used for Redshift. Start by downloading the Snowflake ODBC driver by clicking on the Help menu within your Snowflake account, and then clicking on “ODBC Driver”. Once the appropriate driver has been downloaded, run the installer to install it. After the installer has completed, open the ODBC Administrator and add a new System DSN for the Snowflake driver.
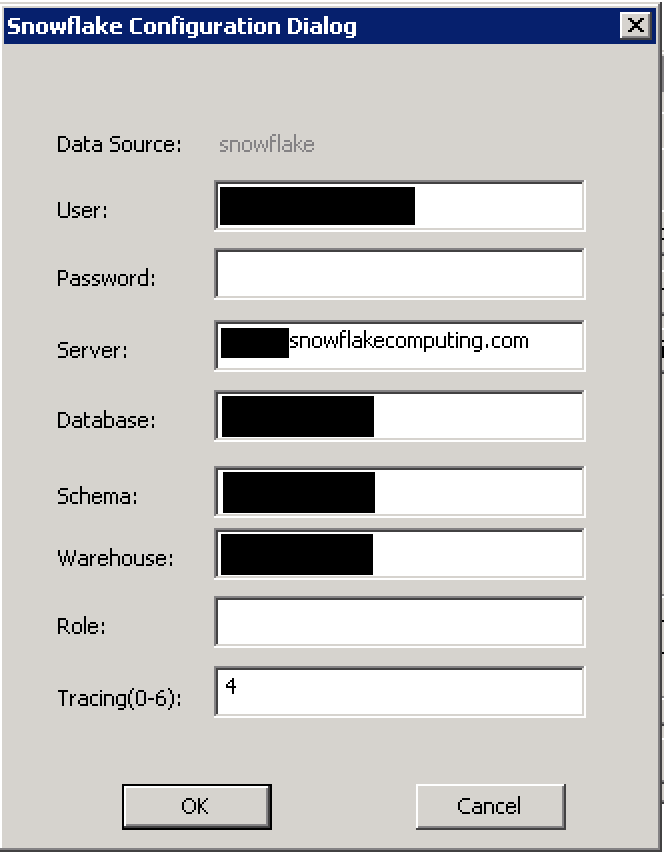
You should see a window similar to the screenshot to the left. Fill out the fields to complete setting up the DSN.
Data Source: The name of the data source. This is a required field.
User: This is the Snowflake account user. This is a required parameter.
Password: This is the user’s password. Snowflake will accept the password, but will not store it within the driver.
Server: This is the Snowflake server that you wish to connect to. Usually this would be your organization’s name followed by .snowflakecomputing.com. This is a required field.
Database: This is the name of the database within Snowflake that you wish to use. Remember, this is the storage aspect of Snowflake architecture.
Schema: You can also designate the schema if you wish.
Warehouse: This is the warehouse name in Snowflake that you wish to use for compute power.
Role: This is the role that you wish to connect as.
Tracing: Tracing level for the data source.
Once you have your System DSN configured, open the admin tool and create a new physical database. Name your new database and then open the “Connection Pools” tab like we did with Redshift. Click the green plus sign to add a new connection pool.
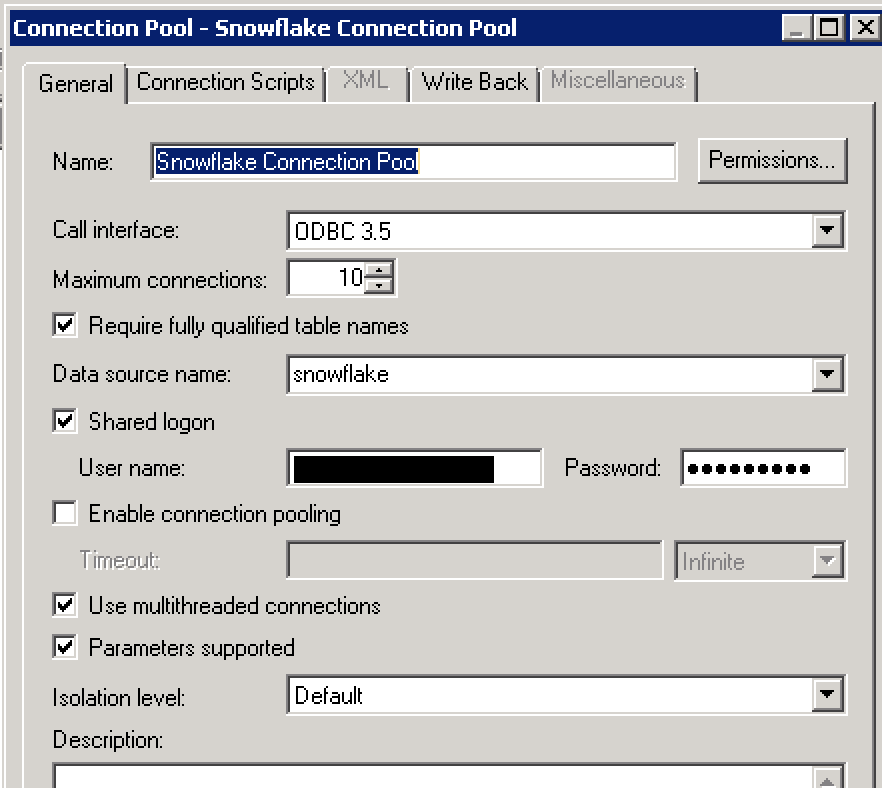
Name your connection pool, change the call interface to “ODBC 3.5” (optional), select the data source name, and enter the username and password. Once you have completed the connection pool set up, click OK. You can now start importing metadata into your physical layer of the repository. (You will need to make sure that your data warehouse is powered up and is running in your Snowflake account).
After you have imported your metadata, modeled it, deployed it into your OBIEE instance and created an analysis, you may find yourself scratching your head while looking at an error like this:

A kind of ambiguous error, right? If you have logging turned on in your repository, you’ll notice that the BI Server is creating SQL at both logical and physical levels. If you’re like me and did some googling and scouring of OTN forums, you’ll probably come away with no clear answers on this error. So, what happens if you try to run the query in the Snowflake Worksheet in the browser? I’ll bet your query will run. How about if you run it in SQL Workbench/J? You’ll probably see an output like this:

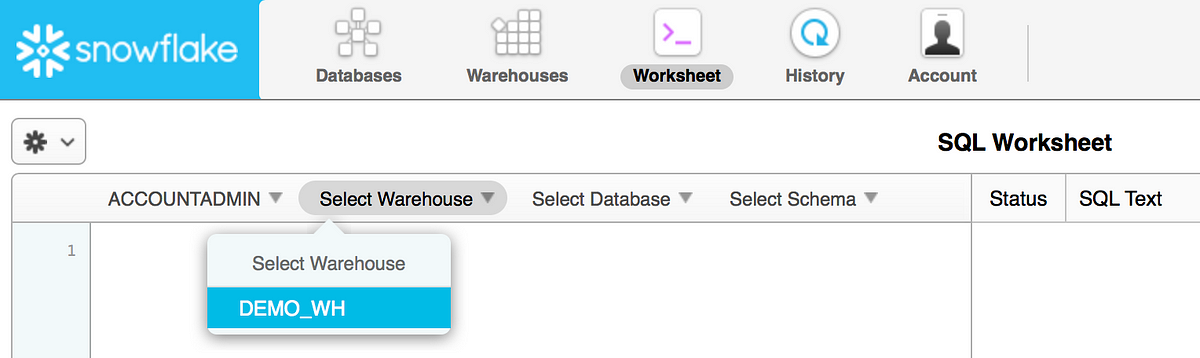
Here is the key to the error. If you run the query within the Snowflake worksheet, you’ll notice that you have the ability to select the Role, Data Warehouse, the Database and the Schema. If you are not using the Snowflake Worksheet (that is, if you are using a third party tool such as OBIEE or SQL Workbench/J), you have to issue a database command called ‘use warehouse’ to select the compute component to use. With this in mind, let’s go back to our Snowflake Connection Pool in our Oracle BI Admin tool to have it issue this command.
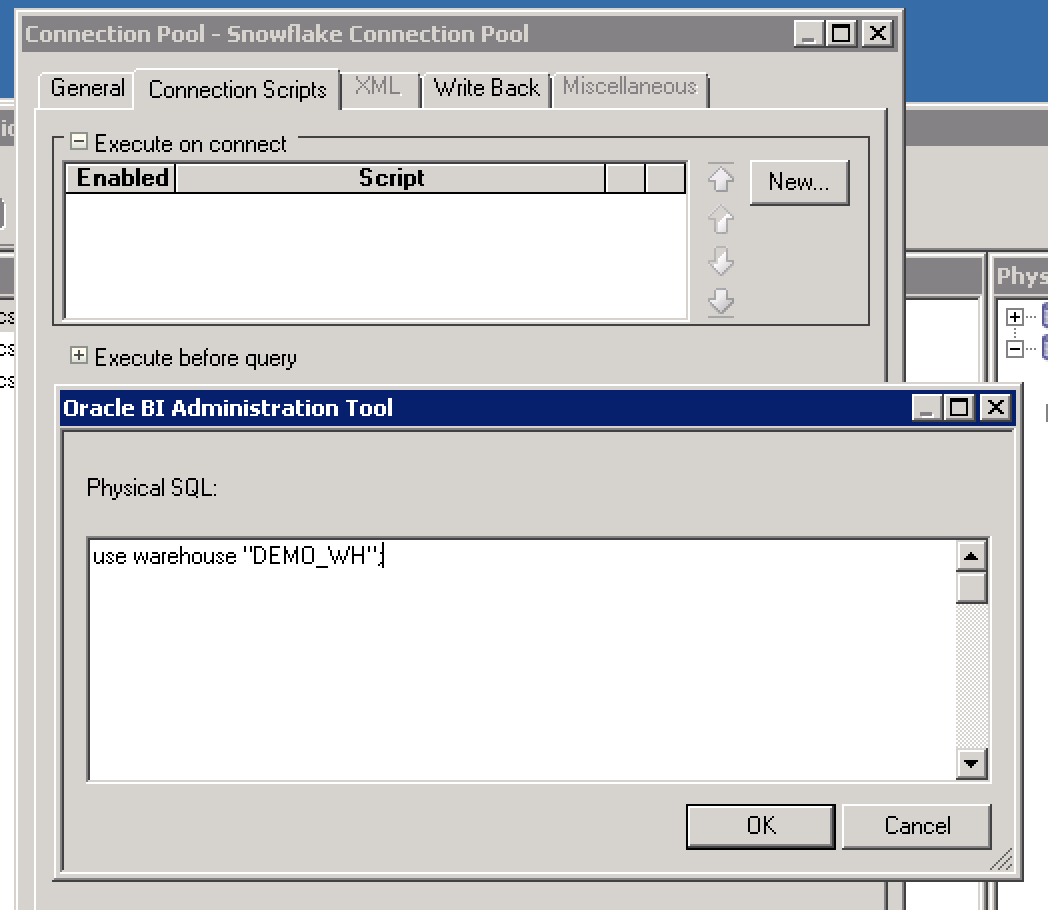
Open the connection pool and click on the “Connection Scripts” tab. Expand the “Execute on connect” section and click on the “New…” button. This will open a window for you to write the physical SQL that will execute upon connection to the database. Place your ‘use warehouse’ command in this window, click “OK”, save and upload the RPD. Your Snowflake instance now knows which warehouse to run the query on, and you should get results.
Another option to execute this command is to use an Initialization Block and Session or Repository Variables. I think that this approach is a bit more complicated, but if you have multiple deployments on Snowflake or are changing the compute warehouses based on users, roles or locations, this may be a good way to run those commands.
Conclusion
Snowflake’s unique offering make it an intriguing choice for those that want to move into the cloud. OBIEE’s ability to connect to this and provide different ways of selecting the appropriate pieces of the Snowflake architecture make it an appealing business intelligence tool for cloud based data sets.