How to Create a Basic Parameter in Looker Using a Liquid Variable
Parameters in Looker increase interactivity for users and provide flexibility from the front end perspective without having to write custom code for each and every field the user asks for.
A parameter creates a filter-only field that can be added as a filter when exploring, but cannot be added to the result set. The parameter allows the user to dynamically make a selection via the filter and change the dimension being displayed in the visualization. The user is able to quickly and easily adjust the data being displayed based on their preference, but what’s actually happening on the back-end is that once they make their change, they are re-writing the SQL logic to accommodate for that change.
This is all possible with the use of the {% parameter %} Liquid variable. “Liquid” is a templating language that can be used in Looker to create more dynamic content. You can find more information about Liquid variables here. There are two ways to make use of a Liquid variable:
- Output Syntax: this type inserts text.
- Tag Syntax: this type is for logical comparisons and other Liquid operations.
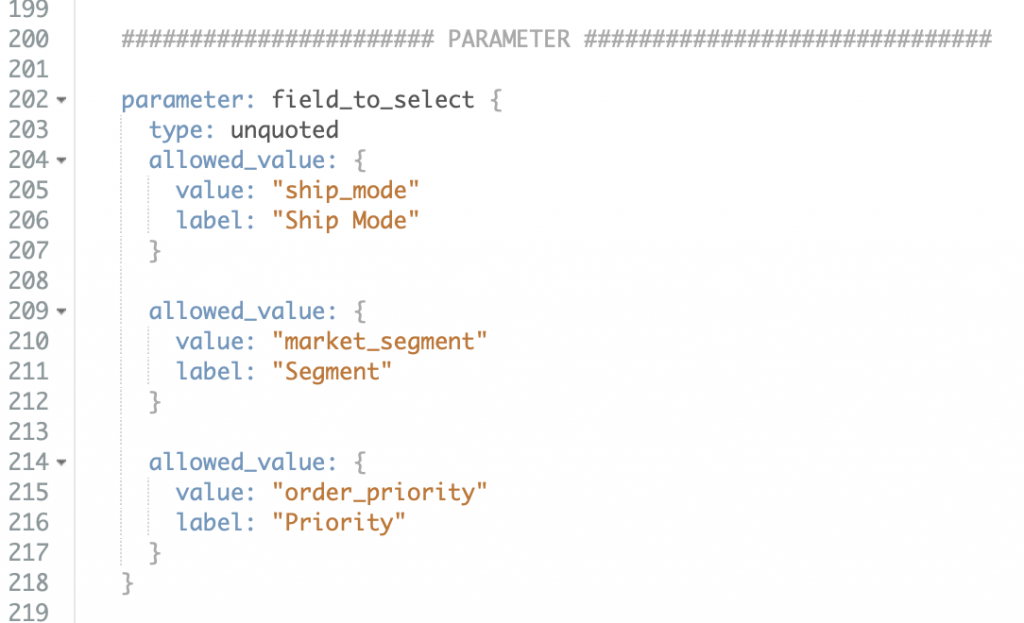
For the sake of this example, I will be placing a parameter inside a liquid tag. Parameters require a couple of inputs such as field_name, type, value and label. Label is actually not necessary for the parameter to work, but it allows the developer to control how this appears on the front-end by making the names more readable. For example, without the label input, users would see “ship_mode” in the list of dropdown values instead of “Ship Mode,” which is much cleaner.

Once the parameter is created, the next step in the process is to create a new dimension, which is where the Liquid variable comes into play. The variable syntax is as follows:
sql: ${TABLE}.{% parameter parameter_name %}
The label_from_parameter input is not necessary, but it is recommended as it will dynamically update the label based on the users parameter selection. Without it, the label would simply display the name of the dimension no matter what is being displayed, which doesn’t provide any context to what the user is looking at. This will eliminate users from having to continually look at the filter to remind them what is being displayed.

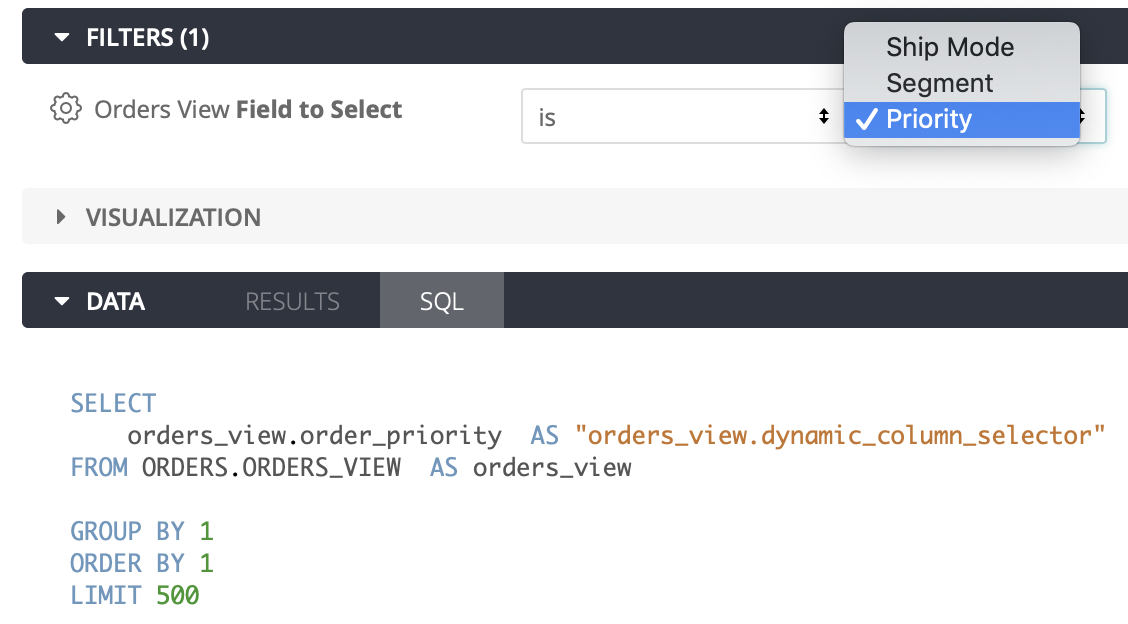
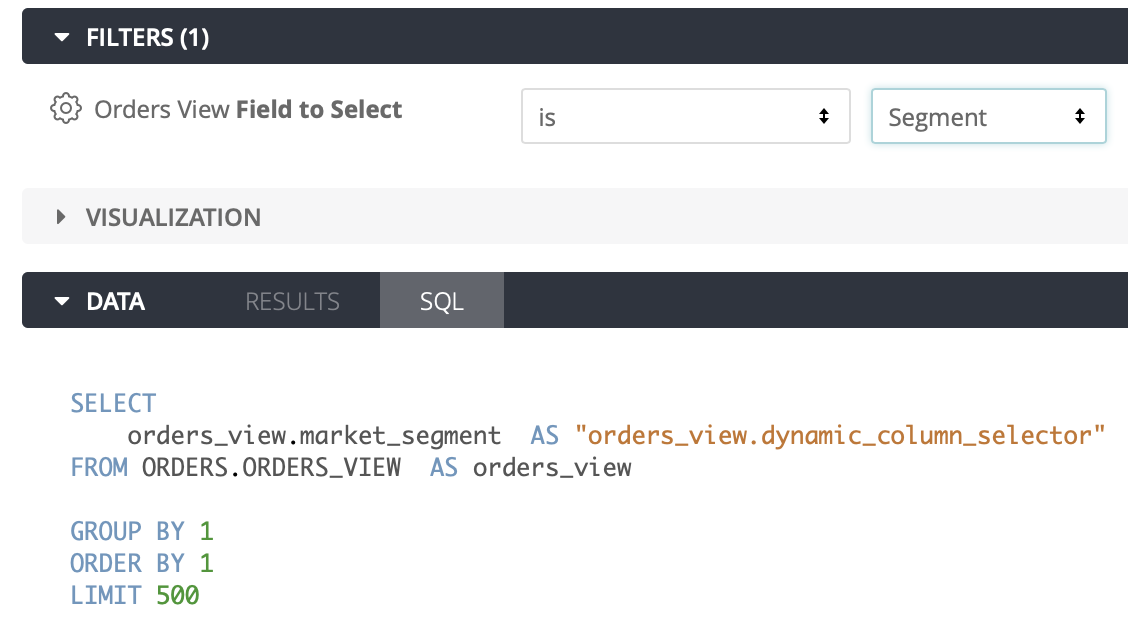
Save the changes to the view file and navigate to the Explore. Add the parameter to the filter section and add the dynamic dimension to the data pane. The user can now select the drop down values that were originally defined in the parameter.

In the SQL you can see that when the parameter selection is changed, it’s actually re-writing the generated SQL in the back end. Whatever value is being selected by the user is what is being inserted into the Liquid block with the % and {}.


The end result is that the user can dynamically change the dimension that is being shown without having to select multiple fields. The beauty is that they are unknowingly updating the SELECT statement each time they change their field selection.
Hope you found this helpful. If you have any questions or comments, feel free to drop me a line at kristi.smith@redpillanalytics.com.
Red Pill Analytics is a Looker Consulting Partner. From proof-of-concept to implementation to training your users, our Looker-certified consultations can help. Or, if you are interested in guidance while working with Looker, Snowflake, Fivetran, or any of your data or analytics projects, feel free to reach out to us on our website or find us on Twitter, Facebook, and LinkedIn.

16 Responses to How to Create a Basic Parameter in Looker Using a Liquid Variable